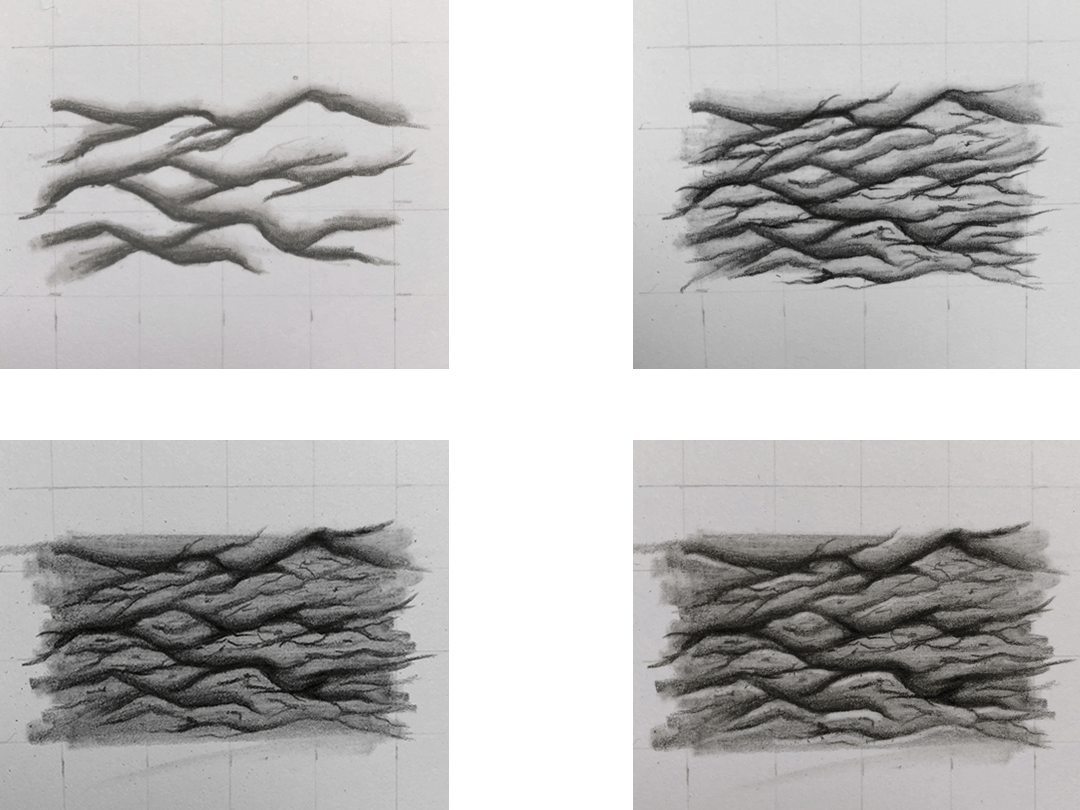
So I thought I would write a short post about how I create the skin texture shown in these pictures. These 3 pieces all have slightly different variations of the same technique. I am anticipating that I will explain this very badly, but hopefully the pics will help!
I draw with a grid so go 1 square at a time….mainly.
1. I start by drawing in the darkest continuous lines that make up the deepest parts of the wrinkles in the skin.
2. I then shade out from this depending on where the light source is. If the animal is lit from above then the shadow will go upwards from this line, leaving the top of the wrinkle the lightest where the light hits.
3. I add in the smaller wrinkles lightly between these and follow the same method on a smaller scale for these.
4. I then go back in and darken the very deep parts of the wrinkles with a black pencil and blend this out with a blending stub.
5. I then add in the specific details of that skin (for example in the rhino skin there were little black pores which I added in with a black pencil.
6. I not tooo specific about making it identical to the picture. It’s more of a case of creating the general texture.
Something that I am still perfecting is making sure the tones are right. It is too easy for me to use this method and end up with the whole area being the same shade. In the past I have gone back in and shaded over the top of these details with graphite. This is time consuming as you then have to go back in with an eraser to pick out the highlights that you have covered with your shading.
Everyone has their own method and I would always urge people to find their own ways around challenging textures. In the futures I would life to use an embossing tool to pick out the very white parts as sometimes it is challenging to ever get these very white areas back with an eraser.
